The Differences?
The differences between hard mode and normal mode for Desert Skies is that the Seeker takes more bullets to kill with the gold bullets eating around 3 bullets until dying with the 4th one.
Another one is that the Seeker kills you faster with his increased speed and damage. You'll die in about 2 hits when at full health.
The last one is that resources are more scattered and hard to find. Wood takes more damage when breaking them giving you less wood.
Wednesday, 22 January 2020
Post #5 ROBLOX
What did you do?
I made a simple obby that's easy to beat with some parkour jumps with a Truss. (Climbable blocks)
What did you learn?
I made a simple obby that's easy to beat with some parkour jumps with a Truss. (Climbable blocks)
 |
| I added some more blocks and was slowly progressing to the next area where I introduce the climbable blocks into a newer guessing game. |
 |
| Then is the end which you've won and completed! Great job! You deserve the achievement of greatest person alive. |
When doing all of this, I learned a lot of stuff that could help me in the future if I ever decide to develop games and for making this obby I learned how to build efficient obbies that are really easy and simplistic with a bit of a twist. I learned how to make things non-collidable so that people just fall to their deaths and yeah it was really fun to make with a bit of a smooth groove.
Post #4 ROBLOX
What did you do?
What I did today was make a simple tutorial on how to get background music on your game using a template from a useful ROBLOX developer known as Cindering. He helps new developers with his tools on how to get background music or other things but I will help explain it a little bit easier because his tutorial is all on the script and jumbled.
BACKGROUND MUSIC
What did you learn?
I learned how to make music zones for specific music to play when I enter certain areas and a bit of scripting. It was just changing numbers but hey, you gotta start somewhere. I used this option in my obby and when you beat it. It played Kool & The Gang Celebration. It was really fun to work with and easy to do it!
What will you do tomorrow?
I think what I will do tomorrow is work on some more building instead of morphing and music stuff and see what I can make that's interesting and cool.
What I did today was make a simple tutorial on how to get background music on your game using a template from a useful ROBLOX developer known as Cindering. He helps new developers with his tools on how to get background music or other things but I will help explain it a little bit easier because his tutorial is all on the script and jumbled.
BACKGROUND MUSIC
 |
| First of all things, go into toolbox and look up 'Background Music', the first choice should be Cinderings with the blue music note and background. Insert it into your game. |
 |
| This is what it should look like, if it doesn't your doing something wrong. |
 |
| Now what music your using is completely up to you but what we are using is Sweet Home Alabama for a laugh. Now if you looked at my last post about the morph. The process is basically the same where you go into the address bar of your browser (ex. https://www.roblox.com/library/2951967620/Lynyrd-Skynyrd-Sweet-Home-Alabama) and copy the numbers that are in the link with CTRL + C |
There we have it! Background music for you to enjoy as you stare into the sunset of Sweet Robloxian Alabama.
What did you learn?
I learned how to make music zones for specific music to play when I enter certain areas and a bit of scripting. It was just changing numbers but hey, you gotta start somewhere. I used this option in my obby and when you beat it. It played Kool & The Gang Celebration. It was really fun to work with and easy to do it!
What will you do tomorrow?
I think what I will do tomorrow is work on some more building instead of morphing and music stuff and see what I can make that's interesting and cool.
Tuesday, 21 January 2020
Post #3 ROBLOX
What did you do?
Today, I made a simple morph tutorial which changes your avatar into clothes that you want or need for a game.
 |
| This is what you should get when you put it onto your baseplate. |
 |
| After doing so what you wanna do is go into the address bar of the browser your using and look for a 9 digit number in it and copy it by doing CTRL + C |
| This is the address bar, look for the 9 digit number here. |
 |
| What you should be doing. |
 |
| This is what the full model should look like and after that you wanna test it out and see if it works, if it does great job! |
 |
| The Finished Product. |
When doing the morphing stuff, I learned that I could make a lot of cool stuff and have players customize themselves when playing my game if I ever made one such as a role-playing game if they needed clothes to get their player in action then I could make a morph for them and have them ready for a fun time.
Morphing was easy, although I used a free model it was alright cause I still learned on my own how to do stuff on my own without any help. It's easy to learn just by doing a few clicks and tutorials like this will help people if they ever needed help doing morphs and such. Finding clothes for morphs is sometimes hard due to the amount of trollers with their spam of copied clothing.
What will you do tomorrow?
I think tomorrow I will show people how to put background music into their game or have a specific area play music but when you exit the area, the music fades.
Monday, 13 January 2020
Post #2 ROBLOX
What did you do?
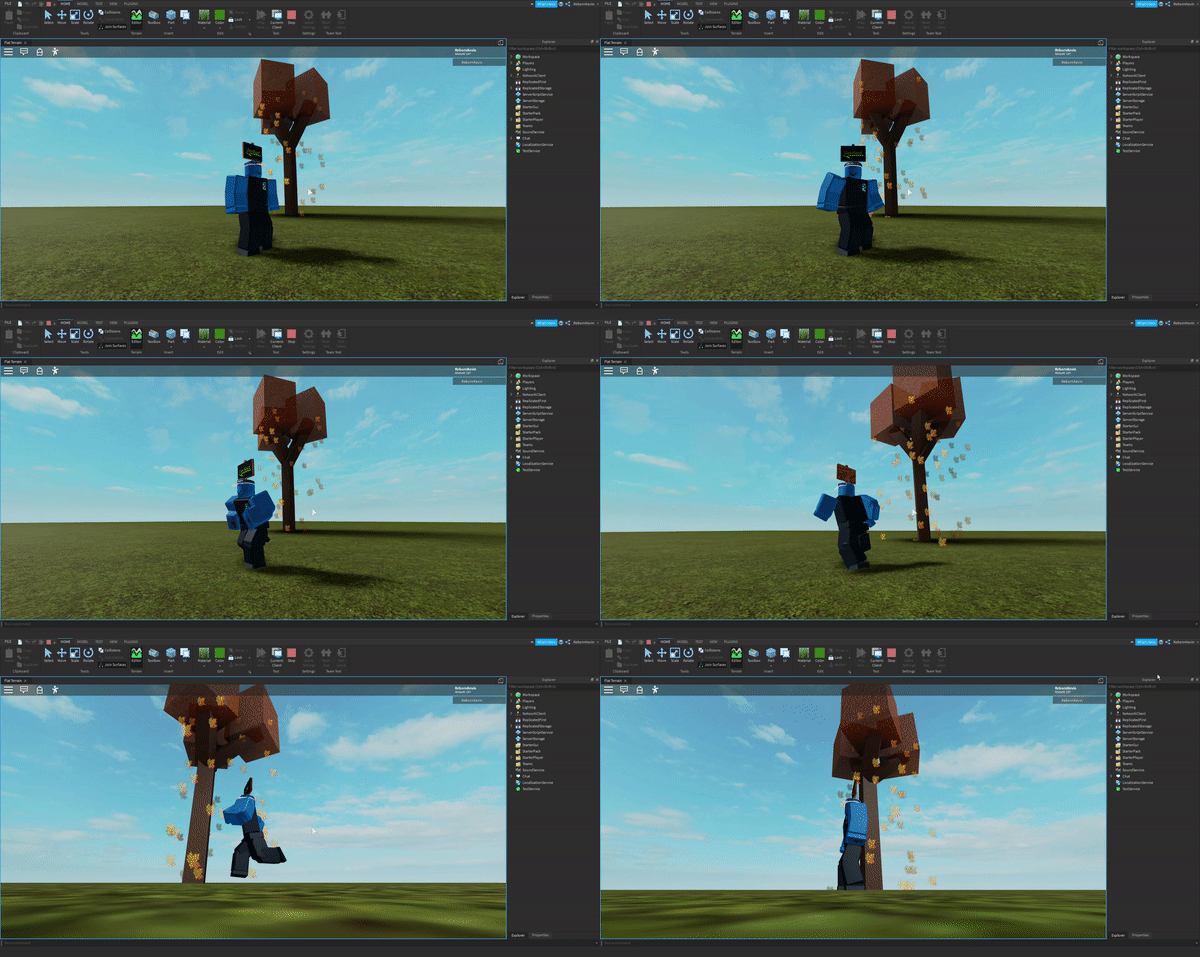
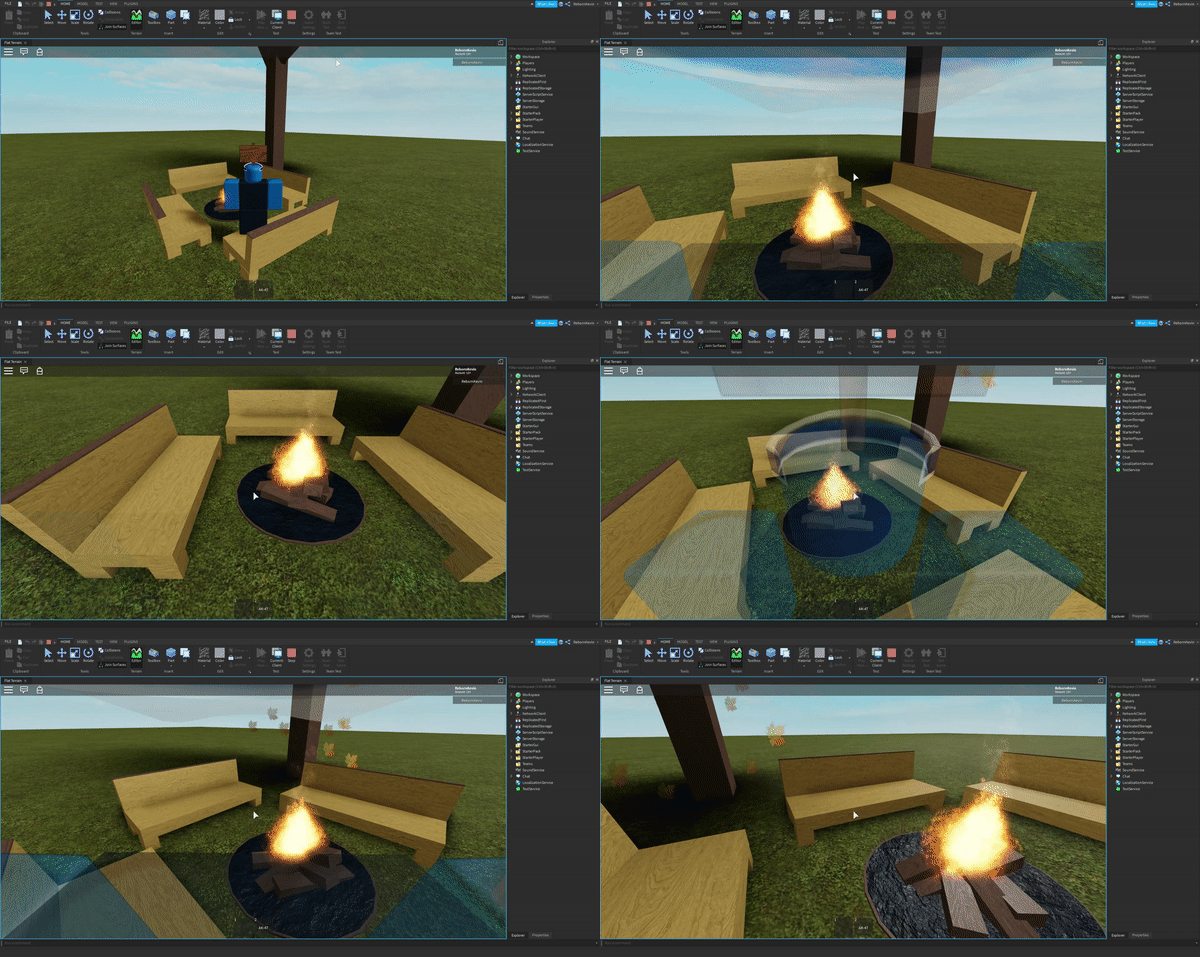
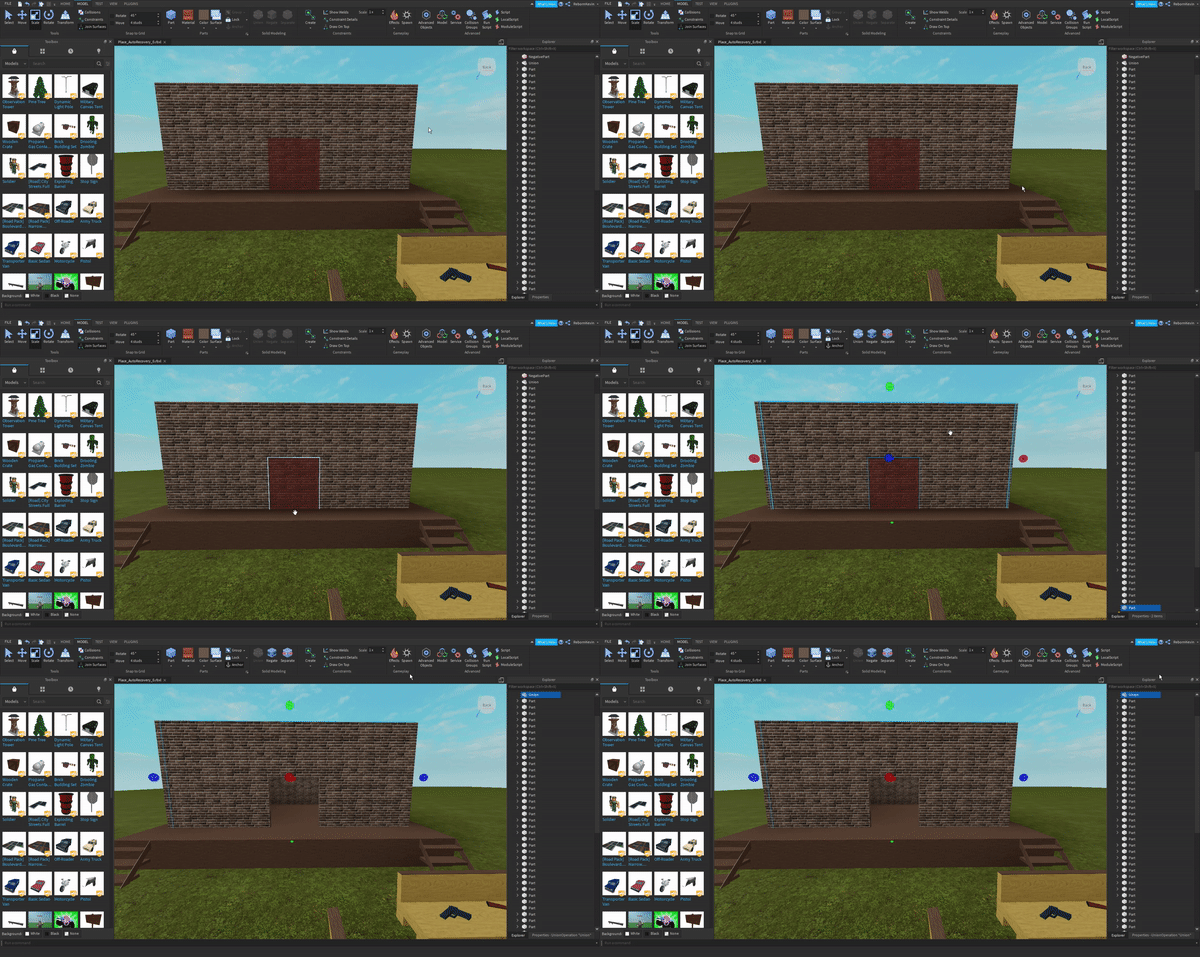
What I did today was make a simple campfire, basic house for beginners and a tree with a particle effect for you to see the true power of ROBLOX.
What did you learn?
What I did today was make a simple campfire, basic house for beginners and a tree with a particle effect for you to see the true power of ROBLOX.
 |
| Final Product should look like this. |
 |
| Final Product should look like this. |
 |
| And there we go, you've officially made a couch, a house, a campfire and a tree that makes your Thanos dream planet complete! Enjoy it while it lasts. |
One of the important things I learned was how to negate and union objects together, objects are really easier to work with if unioned because they are one whole package meaning you don't how to select blocks one by one but you just click one because they are glued together. It's really easy to use if you understand the concept behind it.
Another one is more building skills. I learned that I can position blocks correctly that they look like the actual real life thing or have it look much smoother than intended.
What will you do tomorrow?
What I will do tomorrow is work on more games and do more posts on how to do certain things that will be fun.
I may do a racing track or a sword fighting track. May be both but yet to be decided.
Tuesday, 7 January 2020
Post #1 ROBLOX
What did you do?
Following the site's instructions, I went to the ROBLOX studio homepage and went on the Create & Destroy Template.
After doing so you get a template with tiny buildings and roads for you to work with, the tutorial instructs you to start placing buildings and spawn locations around the area then add roads wherever so that the game can function.
What did you learn?
Following the site's instructions, I went to the ROBLOX studio homepage and went on the Create & Destroy Template.
 |
| Create and Destroy Template near the bottom before Galactic Speedway and after Combat Template. |
After doing so you get a template with tiny buildings and roads for you to work with, the tutorial instructs you to start placing buildings and spawn locations around the area then add roads wherever so that the game can function.
 |
| Template for you to work with. |
 |
| Adding the buildings you get for free and place them around the first half of the map. You can add them in any place leave enough room for roads though. |
After adding cars and props, you select the first half of the map you did and copy and paste it over to the other side and tweak it so that it fits greatly together. Then after doing so add a barrier of terrain so that the players cannot glitch out of the map while playing the game.
And your done, after doing so you publish the game to ROBLOX and enjoy the beginning to your developer career in ROBLOX with a simple mini-game pre-made for you.
 |
| Finished Product |
What did you learn?
What I learned from doing the Create & Destroy challenges is a bit of script editing, although it isn't much it's a beginning to sort of scripting by editing numerals in the script to affect the amount of points you get when you destroy buildings in the game.
 |
| Editing the numbers below to change the amount of points you get depending on the size of buildings within the game. |
I also learned about Terrain building by making a barrier around the map by making grass to protect the players from glitching. It is easy to use and spreads the terrain around in big sizes.
 |
| Adding Terrain to protect the players from glitching. |
I also learned how to publish my games and add thumbnails to my games by taking photos within the game and publishing it via ROBLOX website. Thumbnails are important as it shows players a sneak peek of the game before they play it and it captures interest.
 |
| Adding the game icon for when it appears on the ROBLOX website capturing the attention of players. |
 |
| Thumbnails and videos for a sneak peek of gameplay before players jump into the game and begin to smash the buildings and everything in their path. |
What will you do tomorrow?
I believe tomorrow what I will do is begin making more complex maps and areas to learn more about scripting and maybe building so I can create a game that will hopefully be a bit better than the Create & Destroy one I made. I hope to do good and follow tutorials so I can grasp the concept more easy and script more easily as well.
Friday, 13 December 2019
Desert Skies 4
Game Journalism Day 4
the little things
What did you do?
- Tell a story - a story with pictures especially about when you found (or made) these little things:

A glass helmet and a cape on a holding area in the cave where the old man is, it looks like Mysterio's suit from the Spiderman Comics. 
My first bobblehead which I found in the first town, it was pretty cool and I immediately built a shelf to put my new decoration on.

Killed the Seeker for the first time and took it's head and put it on my ship immediately. I was pretty proud.

Built my first noisemaker to use against the Seeker, it proved useful in stressful situations when I was being chased by the Seeker or distracting it so I can kill it.

My two seeker heads after killing them I put both of them on a lattice wall and laughed at their deaths.

Totem like our school, found in a forest full of dead trees in a tent.

A moving tumbleweed that crossed me during my adventures in the dead forest.
What did you learn?
- I believe I'm advancing since I'm killing Seekers left and right and conserving supplies as I venture throughout the wasteland. I hope hard mode will not be as hard as it says it is.
What is your plan for tomorrow?
- What's next in my adventure is that I'm going to get the new version and try to play as pro as I can and make sure to take care of my character and move throughout the deserts as safely as I can by conserving fuel and supplies.
- add an image of your airship
Subscribe to:
Comments (Atom)


