What did you do?
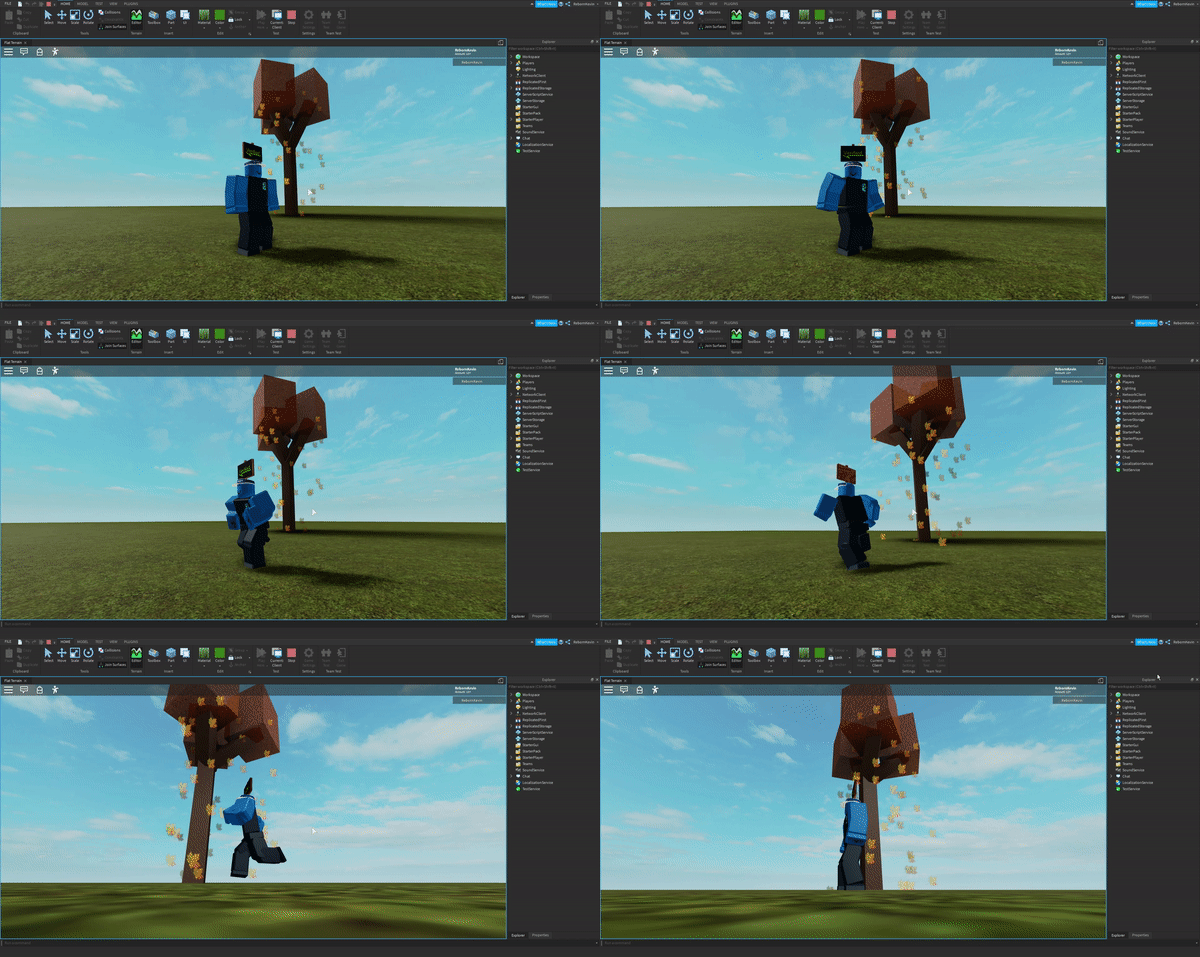
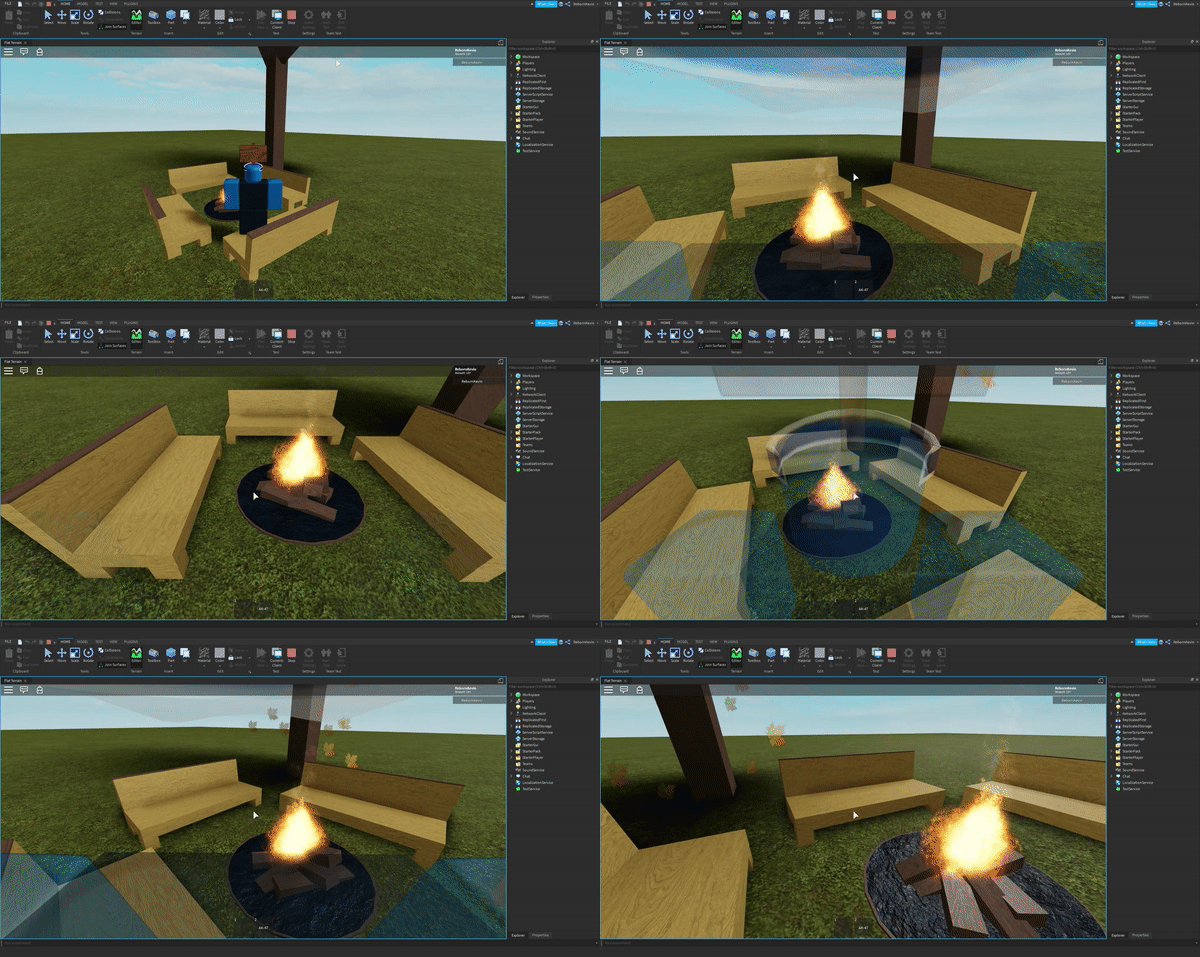
What I did today was make a simple campfire, basic house for beginners and a tree with a particle effect for you to see the true power of ROBLOX.
 |
First what you wanna do is build the root of the tree using the build option and square part button on the U.I. After building the root like I do so far you wanna make another square part but make the colors a bit autumn and add a transparent effect on it and add it onto the tree roots and stems. And after doing that you wanna right click on the leaves and to [INSERT OBJECT] then you wanna insert a particle emitter and go grab a random transparent leave decal on the ROBLOX Library catalogue where you can get many things for your games.
|
 |
| Final Product should look like this. |
 |
| After building the tree, you want to build a campfire, what you do is grab a sphere part from the U.I section and scale it down to a pancake shape and make the material, 'Slate' then add a bunch of square wood pieces onto the slate sphere piece and scatter them around. After doing so you want to add a fire effect by going into the U.I and insert object and find fire. (Fire will not hurt you in game unless caused by a script.) |
 |
| Final Product should look like this. |
 |
Building the campfire is the hard part but the easiest part is making benches for a more good feeling vibe around the campfire by mixing a bunch of square parts together such as 4 square parts to hold up the benches then a rectangle square part as the sitting area then the back area for pure relaxation as you relax around the campfire.
|
 |
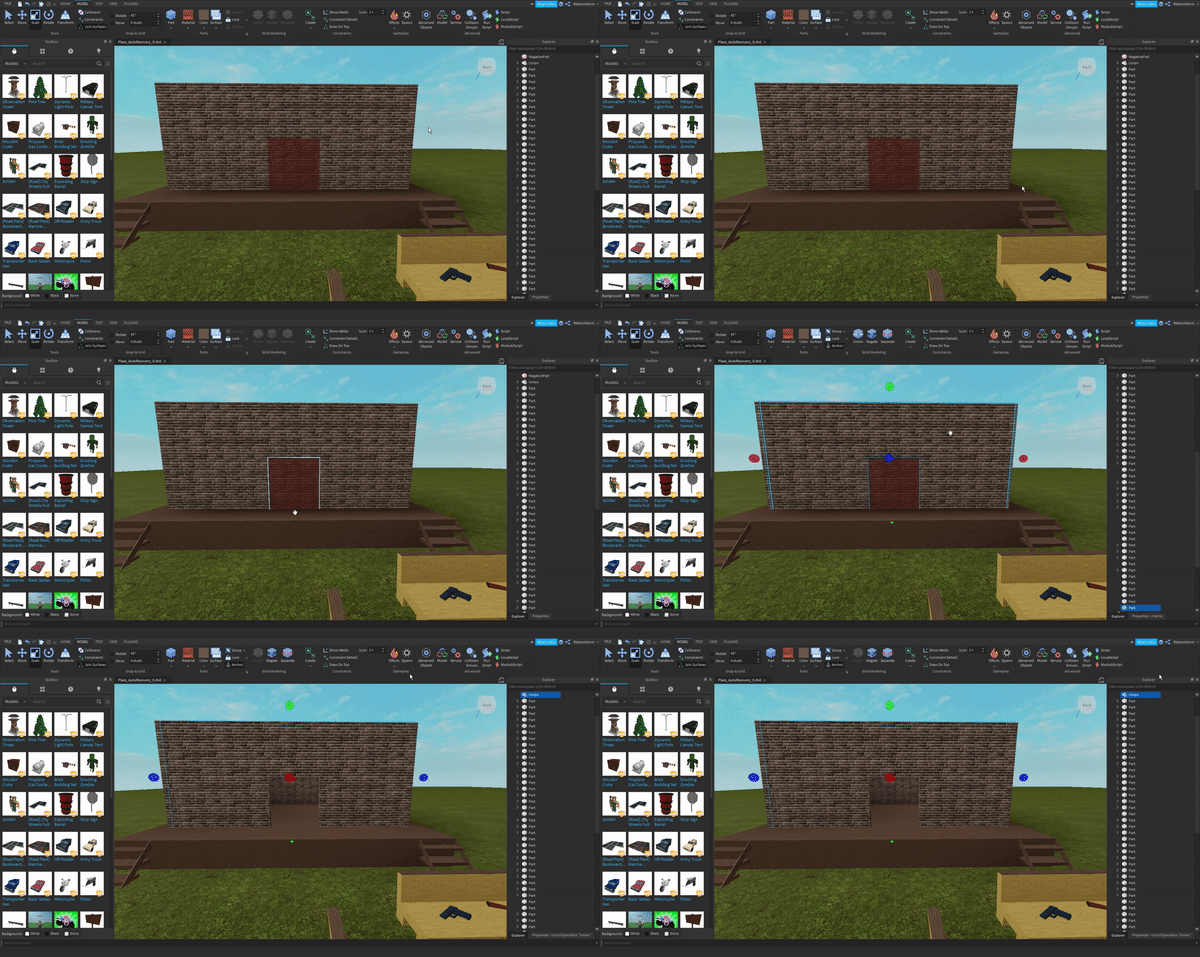
| Next up is building the small house, first build the foundation with normal wood with stairs with something at the sides connecting them. (Come on, we want realism in a lego game.) Then what you wanna do first is make the building by placing brick walls and lining them up and connecting them. Eventually what your gonna do is CTRL + D the front wall and shape it like a big door and then place it wherever you desire your door to be placed at and then stretch out the door shape so that it's front and back are sticking out of the front wall then click the negate button which is in the model section of Studio. Once doing so you wanna hold Left CTRL and click on the negated block and the front wall and union them together making a door shape in your front wall. |
 |
| Final product. And after doing so make a simple wedge room on the top because this is just a beginner house remember that. Then we are moving on to making one household item that every house needs! A couch. |
 |
| Ahh the couch, the household item that every lazy person has to take care of their sleeping and watching needs. So we must build one, the way to build one is complex but not really what you need is 4 square/rectangle parts and two cylinders. First shape the main two parts to connect with one part rotated at an angle so it looks like the couch is leaning back like most couches are. For the remaining two parts position them at the side of the couch with them a bit higher than the bottom portion of the couch then add two cylinders at the top of the side parts to make them look like arm rests. |
 |
| And there we go, you've officially made a couch, a house, a campfire and a tree that makes your Thanos dream planet complete! Enjoy it while it lasts. |
What did you learn?
One of the important things I learned was how to negate and union objects together, objects are really easier to work with if unioned because they are one whole package meaning you don't how to select blocks one by one but you just click one because they are glued together. It's really easy to use if you understand the concept behind it.
Another one is more building skills. I learned that I can position blocks correctly that they look like the actual real life thing or have it look much smoother than intended.
What will you do tomorrow?
What I will do tomorrow is work on more games and do more posts on how to do certain things that will be fun.
I may do a racing track or a sword fighting track. May be both but yet to be decided.


No comments:
Post a Comment